
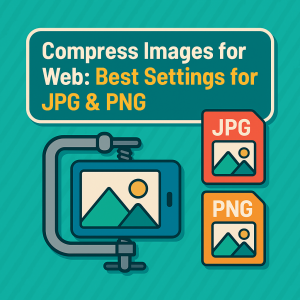
How to Compress Images for Web: Best Settings for JPG & PNG
Bismillahir Rahmanir Rahim. Large images are one of the most common reasons a website feels slow. Compressing images properly reduces page load time, improves user experience, and helps SEO. In this guide you’ll learn practical, easy-to-follow settings for JPG and PNG, how to choose a format, and a quick workflow using free browser tools so your pages load fast without visible quality loss.
Why compress images?
Compressed images load faster, use less bandwidth, and increase conversions. Google’s Page Experience signals favor fast pages, and image weight is often the biggest opportunity for improvement on content-heavy sites.
Choose the right format first
JPG (JPEG) — Best for photographs and images with many colors and gradients. JPG is lossy but can reduce file size dramatically.
PNG — Best for logos, illustrations, images that require transparency or sharp edges. PNG is lossless (larger files).
WEBP — Modern format with excellent compression (use when supported). Convert to JPG/PNG if compatibility needed.
Rule of thumb: Use JPG for photos, PNG for graphics & transparency.
Best compression settings (practical numbers)
JPG quality:
70–85% = great balance for web (70 for small thumbnails, 80–85 for hero images)
Example: a 3MB photo → JPG@80% ≈ 300–700KB (depends on content)
PNG:
Use PNG only when necessary (transparency or pixel-perfect).
For photographs in PNG → convert to JPG for huge savings.
For PNG graphics, use a PNG optimizer (pngquant/pngcrush) — if not available, try converting to indexed PNG or use your Image Compressor tool.
Resize before compressing:
Don’t serve a 4000px image if your page displays at 800px. Resize to required display dimensions first.
Quick workflow (best order)
1. Decide final use — thumbnail, article image, hero banner, or social share.
2. Resize the image to the largest display size you need (e.g., hero 1600px, article image 800px). Use Image Resizer.
3. Choose format — JPG for photos, PNG for transparency.
4. Compress with a quality setting (JPG 70–85). Use Image Compressor.
5. Check file size & visual quality — compare original vs compressed at 100% zoom; if artifacts visible, raise quality slightly.
6. Create responsive srcset — generate multiple widths (e.g., 400, 800, 1200) so browsers load the appropriate one.
Example (before / after)
Original photo: 3.2 MB, 4000 × 3000 px
Resize to 1200 px wide → then compress at JPG 80% → ~450 KB
That’s a ~7× reduction — big win for page speed.
Extra tips for best results
Use WebP where supported — significantly smaller than JPG for same quality. Provide fallback JPG for older browsers.
Lazy-load offscreen images so below-the-fold images load later.
Use descriptive filenames (how-to-compress-images.jpg) and add alt text for SEO/accessibility.
Cache & CDN — serve optimized images from a CDN for global users.
Automate on upload — for WordPress, consider plugins that generate resized+compressed versions (but test quality).
Tools & Resources
Compress your image now: Image Compressor
Resize before compressing: Image Resizer
Convert formats: PNG → JPG, WEBP → JPG
FAQ
Q: Will compression reduce image quality?
A: If you use aggressive settings (JPG 40–50%), visual artifacts appear. Use 70–85% for web — small quality loss but big size savings.
Q: Should I always convert PNGs to JPGs?
A: No — only convert PNGs that are photographs or don’t need transparency. Keep PNG for logos and images needing sharp edges or transparency.
Q: What about mobile users?
A: Serve smaller sizes (400–800 px) and lower quality (70%) for mobile. Use responsive srcset for best results.
Ready to shrink your images? Try our free Image Compressor and Image Resizer to quickly optimize photos for web — no upload, 100% private.
If you are converting photos from an iPhone, you may also want to use our HEIC to JPG converter for better compatibility.